Stock agencies need near-perfect photos, with little-to-no noise, compression, or focus issues.
Even the very best photographers encounter all of these issues in their images now and then. The way around it? Downsizing.
Now, this doesn’t work on every image. But if one of your photos has very SLIGHT noise, compression, or focus issues… often time you can get rid of them by exporting the photo at a smaller size before you send it to an agency.
Here’s how it works…
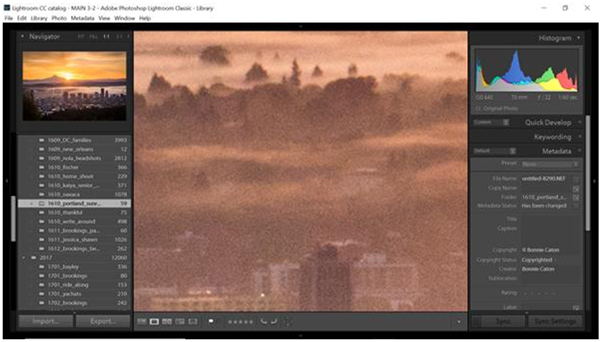
- Identify the issue. Start by always viewing your photos at 100% in Lightroom before you send them to an agency. If you notice that the focus on your subject isn’t tack-sharp… or there’s a strange, grainy/sandy texture over parts of your image… it might not make it into stock agencies at full-size.

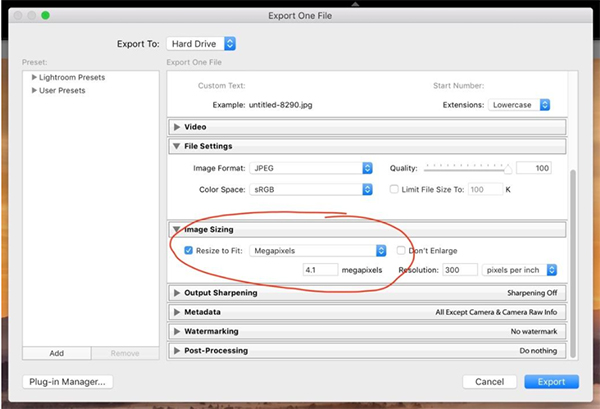
- Export at a smaller size. When you go to export your photo in Lightroom, check the “resize to fit” box, then in the drop-down menu, select “megapixels,” and type in “4.1.” This will reduce the size of your photo to the smallest size accepted by most agencies. (Make sure the “quality” slider is always at 100%.)

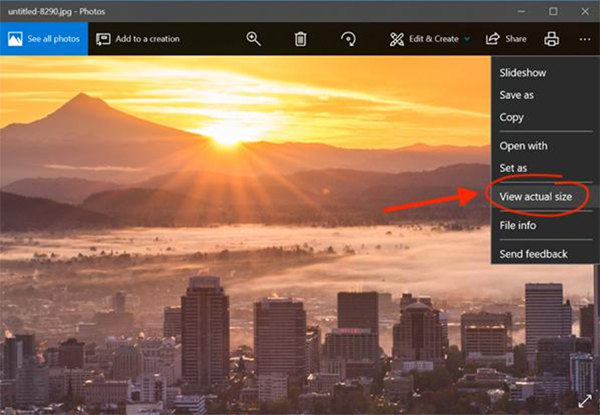
- Check the final image. Export your image and then check it in your computer, outside of Lightroom, by viewing it at “actual size.” If you notice the issue is gone, go ahead and submit it!

And that’s it!
Again, downsizing your images won’t fix every photo. Sometimes the issue is too extreme. But it’s a super-quick fix that will save many!
[Editor’s Note: Learn more about getting started selling your photos online in stock agencies – no matter how much or little photography experience you have – in the Breakfast Stock Club e-newsletter. It’s once a week, and it’s free to join, here.]


