Light writing is like unwrapping a gift every time you shoot. You never know exactly how the photo will look until after you take the shot – it’s a surprise every time! If you’re looking to add some creativity and fun to your photography, or simply try something new, light writing is an easy and exciting way to do it. (You can find more useful Photography tips right here.)
What is light writing?
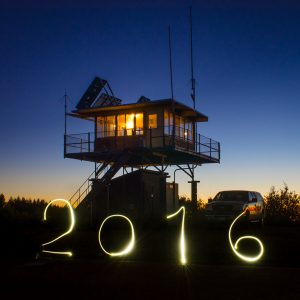
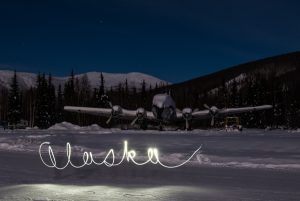
Light writing is when you use a long shutter speed and use a light source to “write” or make patterns or drawings in your photo. If you went out to shoot the sunset, and it’s just not looking great, or you’d like to add an extra “sparkle” to your photos, light writing is easy to do.
The results can be startling, and you can get as creative with them as you want. The more you mix them up, the better they get.
Light Writing: What you need
- Camera that you can set to Manual mode (see our camera buying guide for help)
- Light source (flashlight, sparkler, glow sticks…)
- Tripod
- Darkness – either outside at night, or in a dark room.
Here are two fun light writing tricks to try:
Light Writing Trick #1: The Shoot & Shake
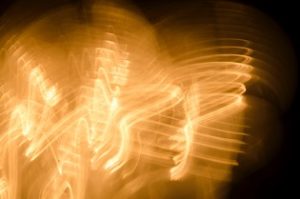
For this trick, all you need to do is set your camera to a long shutter speed (between 0.5 and 5 seconds, depending on the light source and the effect you want).
Next, point your camera at something bright like an interesting lamp (in this case, with a ribbed glass cover that ended up making fun patterns).
Then, while your shutter is open, grab hold of your camera (tightly!) and shake! Here’s what I got…
Light Writing Trick #2: The Light & Write
- Put your camera on a tripod.
- Set it to Manual mode, and dial in these settings:
– ISO 200
– Aperture (f-stop) between f-8 and f11
– Shutter speed around 10-20 seconds. (You’ll get a better feel for how much time you need after you take a few shots.) - Pre-focus your camera about 5-10 feet in front of you, where you plan to stand for the light writing.
To do this, put something else where you want to stand, press the shutter half way. If it’s dark, ask a friend to stand where you want to stand and shine a flashlight onto him/her, so that you can focus.
Then, flip the switch on your lens to Manual focus, so that you don’t have to touch the focus again. (Note: Don’t forget to flip the switch back to auto when you’re done.)
- To do the light writing yourself, you can use a remote or set the timer on your camera. Then, get your idea in mind, hit the shutter, run into place, and wait for it to fire. When you hear it go, write in the air… draw… experiment!
Note: If you want separation in words or shapes, just cover the flashlight or sparkler with your hand while you move to the next spot.
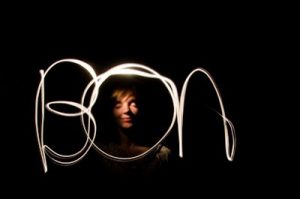
And if you want to include your face or body in the shot, stand really still and turn the flashlight on yourself for the last few seconds. These take lots of tries to get right, but they’re really fun.
To get a long shutter speed, shoot at dusk or dark.
Take my photo with the trees in the background, for example. Notice that even though it was dusk, you still can’t see me in the photo. This is because I was moving. I blurred so much that I’m not even visible.
Play a LOT to get the photos you want. It takes some practice to get words and drawings right, as you have to either do them backwards, or flip the image later in the computer.
I hope you’ll enjoy light writing. Now go forth and play!
[Editor’s Note: Learn more about how you can fund your travels and make an extra income with photography in our free online newsletter The Right Way to Travel. Sign up here today and we’ll send you a new report, Profit from Your Photos: A Quick-Start Guide, completely FREE.]


