Interior architectural photography poses a number of challenges, including cramped rooms, low light, and cluttered subjects. Lighting-related challenges are often handled by using artificial lights, but most can be tackled with simple techniques that require no specialized equipment or knowledge. Following are seven simple tips that will improve your interior photographs. 1. Use a tripod: Photographing architectural interiors almost always means photographing in low-light situations, which in turn produces long shutter speeds. Using a tripod will insure tack-sharp images even if your shutter speed is long. If a particular location, like a museum, does not allow tripods, then increasing your ISO will give you faster shutter speeds (but will increase noise in your images as well). Engaging your camera’s stabilization system will also help. 2. Shoot straight (but maybe not): Making sure horizontal and vertical lines look the part is paramount for traditional interior photography. 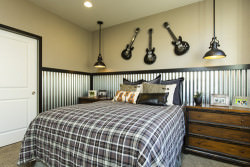 Nothing is more distracting than a sloping table or a tilting door. Many cameras have built-in electronic levels, or you can buy a bubble level that attaches to your camera’s hot shoe. On the other hand, travel publications are much more forgiving when it comes to tilted or converging lines, as long as it’s clear the photographer intended the result in the first place. 3. Go wide: Using a wide-angle lens will allow you to capture entire rooms (or more) in tight quarters.
 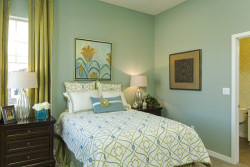 I literally had my back against the wall while taking this shot and could not have captured as much of the bedroom without my wide-angle lens. 4. Shoot into a corner: Photographing into a room’s corner (as in the first photo above) adds depth to an otherwise two-dimensional object. It also makes a room look more spacious. 5. Photograph vertical and horizontal versions: Although vertical images are not common in the traditional world of architectural photography, they definitely have a place in travel photography. Not only do vertical images offer more options to magazine editors, they are also great for emphasizing interesting details in a room’s ceiling or floor.
  6. Photograph details: Another type of image that will offer additional options to magazine editors is the detail shot, where only a slice of a room is depicted. These images also tend to be more intimate, creating a nice compliment to wider shots.
 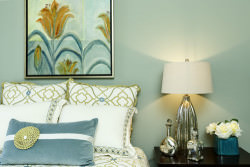 7. Turn on the lights: Nothing could be simpler than turning on the lights in a room before taking a picture. Doing so helps illuminate a room or table (as above), plus it adds a warm, welcoming feeling to your subject. Opening shades and curtains will also help by adding natural light to the scene, but be careful with direct sunlight streaming in, which can cause harsh, unattractive shadows. Share on Facebook
[Editor’s Note: Learn more about how you can turn your pictures into cash in our free online newsletter The Right Way to Travel. Sign up here today and we’ll send you a new report, Selling Photos for Cash: A Quick-Start Guide, completely FREE.]